To pluck and clean a chicken, start by removing the feathers and then prepare it for cleaning.
Properly plucking and cleaning a chicken can have a significant impact on its taste and texture. By effectively removing feathers and thoroughly cleaning the bird, you ensure a better eating experience with tender and flavorful meat.
Plucking and cleaning a chicken may seem like a daunting task, but its importance cannot be overstated when it comes to the taste and texture of the meat. By properly removing feathers and entrails and maintaining cleanliness throughout the process, you can significantly enhance the overall quality of your chicken dish.
Let’s dive deeper into the impact of plucking and cleaning on the taste and texture of chicken.
The Importance Of Removing Feathers And Entrails
When it comes to plucking and cleaning a chicken, removing feathers and entrails is essential. Here are some reasons why:
- Feather removal ensures a more appealing presentation: By plucking all the feathers, you can achieve a visually pleasing and appetizing appearance for your chicken. No one wants to see feathers sticking out while enjoying their meal!
- Reduced chewiness and improved tenderness: Feather removal contributes to reducing the chewiness of the meat, making it more tender and enjoyable to eat. It allows for better penetration of marinades and flavors, resulting in a succulent and flavorful chicken dish.
- Elimination of unpleasant tastes: Feathers can sometimes leave behind an undesirable taste when cooked. Ensuring thorough plucking removes any potential remnants that could affect the overall flavor of the chicken.
Cleaning out the entrails is equally crucial. Here’s why it matters:
- Prevents contamination and foodborne illnesses: Removing the entrails, including the organs, reduces the risk of bacterial contamination. This step is critical for food safety, as uncleaned entrails can harbor harmful bacteria that can cause foodborne illnesses.
- Enhances the natural flavors: Cleaning the entrails eliminates any unwanted and strong flavors that may affect the taste of your chicken. By removing this portion, you allow the natural flavors to shine through, resulting in a more delicious and enjoyable dining experience.
How Cleanliness Affects Food Safety And Hygiene
Maintaining cleanliness throughout the plucking and cleaning process is paramount. Here’s why:
- Eliminates bacteria and pathogens: A clean working environment, tools, and hands help prevent the spread of bacteria and pathogens, ensuring food safety and reducing the risk of contamination. By adhering to good hygiene practices, you can protect yourself and others from potential illnesses.
- Preserve the quality of the meat: Cleanliness plays a crucial role in preserving the quality of the chicken. By practicing proper sanitary measures, you minimize the chances of spoilage, maintaining the freshness and taste of the meat.
- Builds consumer trust: In today’s food industry, consumers are increasingly concerned about food safety and hygiene. By prioritizing cleanliness, you not only adhere to regulatory standards but also build trust with your customers, fostering loyalty and repeat business.
By understanding the impact of plucking and cleaning on the taste and texture of chicken, as well as the importance of removing feathers and entrails and maintaining cleanliness, you can take your culinary skills to new heights. So, roll up your sleeves, follow proper practices, and enjoy the delicious and satisfying results of a well-prepared chicken dish!
Gathering The Right Tools For The Job
Gather the necessary tools for plucking and cleaning a chicken effectively. Equip yourself with the right utensils and materials to ensure a successful chicken preparation process.
Getting ready to pluck and clean a chicken requires a few essential tools and supplies. To make the process smooth and efficient, gather the following items:
Plucking Feathers: Tools and Techniques
- Feather plucker: A mechanical plucker or plucking machine can greatly speed up the plucking process. It features rubber fingers that gently remove feathers when turned on.
- Plucking by hand: If you prefer a manual approach, have a plucking tool on hand. This can be a plucker, a pair of poultry shears, or even a simple but effective method called waxing.
- Boiling water: Prepare a large pot of boiling water to scald the chicken before plucking. This helps loosen the feathers and makes them easier to remove.
- Gloves: Wearing gloves will protect your hands from becoming scalded or irritated during the plucking process.
- Clean workspace: Ensure you have a clean and spacious area to work in, allowing you to maneuver the chicken without any impediments.
- Hose or water source: Having a nearby hose or water source will allow you to rinse the chicken during and after plucking.
Cleaning the Chicken: Tools and Supplies Needed
- Cutting board: Choose a large, sturdy cutting board that provides ample space for handling the chicken.
- Sharp knife: A sharp knife is essential for cutting through the chicken’s skin and joints during the cleaning process.
- Scissors: Use a pair of kitchen scissors to trim any excess fat or skin.
- Water: Ensure a clean water source is readily available for rinsing the chicken both inside and out.
- Dish soap: Use a mild dish soap to thoroughly clean the chicken, removing any residual dirt or debris.
- Paper towels: Have a supply of paper towels on hand for drying the chicken after cleaning.
- Plastic bags: Prepare plastic bags for storing any discarded parts or waste from the chicken.
By gathering these tools and supplies, you’ll be well-prepared for plucking and cleaning a chicken effectively and efficiently. Remember to maintain cleanliness throughout the process to ensure a safe and hygienic end result.
Preparing The Chicken For Plucking
To prepare a chicken for plucking and cleaning, start by scalding it in hot water for about 30 seconds. This loosens the feathers and makes them easier to remove. Then, use a plucking machine or pluck the feathers by hand.
Finally, clean the chicken thoroughly before cooking.
When it comes to preparing a chicken for plucking, there are a few essential steps to follow. It’s important to effectively loosen the feathers before moving on to removing them. In this section, we will discuss scalding the chicken and removing feathers effectively and efficiently.
Scalding The Chicken To Loosen Feathers
Scalding is an important step in preparing the chicken for plucking. It helps to loosen the feathers, making it easier to remove them later. Here’s how to scald the chicken properly:
- Fill a large pot with water and heat it to around 140°F (60°C).
- Carefully lower the chicken into the pot, making sure it is completely submerged.
- Allow the chicken to remain in the hot water for approximately 4-5 minutes. This will help loosen the feathers.
- Monitor the water temperature to ensure it stays within the desired range.
- Using a thermometer, check the temperature of the water regularly to avoid overheating the chicken.
- After the scalding process, transfer the chicken to a clean surface for the next step.
Removing Feathers Effectively And Efficiently
Now that the feathers are loosened, it’s time to remove them from the chicken. Follow these steps to ensure effective and efficient feather removal:
- Begin by plucking the larger feathers from the chicken by hand. Start with the wings, then move to the back, tail, and thighs.
- For smaller or harder-to-reach feathers, use a pair of pliers or tweezers to grip and pull them out.
- Work systematically, focusing on one area at a time, to ensure all feathers are removed.
- Be careful not to tear the skin while plucking, as this can affect the appearance and quality of the chicken.
- Once the majority of the feathers are removed, use a propane torch or butane torch to singe off any remaining small feathers and stubble. This process helps to give the chicken a clean finish.
- Take your time and be thorough to ensure all feathers have been effectively removed.
By following these steps and paying attention to detail, you can successfully prepare a chicken for plucking. Scalding the chicken and removing feathers effectively and efficiently is crucial in achieving a well-prepared chicken for cooking or further processing.
Cleaning The Chicken After Plucking
Learn how to effectively clean a chicken after plucking with these easy-to-follow steps. This essential process ensures your poultry is prepared for cooking or storage.
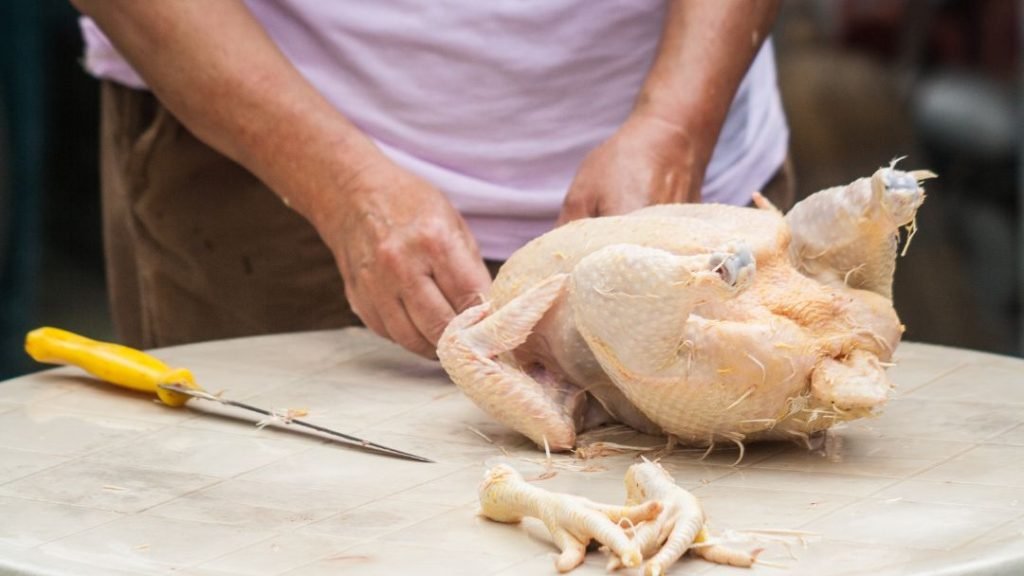
Cleaning the chicken after plucking is an essential step to ensure proper food safety and hygiene. Once the feathers have been removed, it’s time to take care of the next crucial steps: gutting the chicken and washing it thoroughly. Follow these instructions to clean your chicken effectively:
Gutting The Chicken: Removing Entrails And Organs
- Lay the chicken on a clean cutting board or surface.
- Locate the vent, which is located near the tail end of the chicken.
- Insert a sharp knife gently into the vent and carefully cut upward, stopping when you reach the bottom of the breastbone.
- Continue cutting along the breastbone, using the knife to loosen the breast meat from the ribs.
- Once the breast meat is separated, tuck the breast aside and reach into the body cavity to remove the entrails and organs.
- Take out the heart, liver, and gizzard, which are often found inside the body cavity.
- Rinse the cavity with cold running water, removing any remaining bits of entrails or organs.
- Trim off any excess fat or loose skin.
- Pat the cavity dry with paper towels.
Washing And Rinsing The Chicken Thoroughly
- Place the cleaned chicken under cold running water to rinse off any remaining debris.
- Use your hands to rub the chicken gently, ensuring all surfaces are washed thoroughly.
- Pay extra attention to hard-to-reach areas, such as the crevices between wings and legs.
- Rinse the chicken until the water runs clear, indicating that it’s free of impurities.
- Once the chicken is clean, pat it dry with paper towels to remove excess moisture.
- Double-check the cavity, making sure it’s completely dry as well.
Remember, proper cleaning techniques are essential to prevent the spread of bacteria and ensure the chicken is safe to consume. Take your time and be thorough in gutting and washing the chicken. By following these steps, you can guarantee a clean and healthy chicken for your cooking endeavors.
Professional Tips For A More Efficient Process
Learn professional tips for a more efficient chicken plucking and cleaning process. Enhance your skills with easy-to-follow techniques for faster and more effective chicken preparation.
Plucking and cleaning a chicken can be a messy and time-consuming task, but with the right techniques and tips, you can streamline the process and ensure a more efficient experience. Whether you’re a professional chef or an amateur cook, these strategies will help you pluck and clean a chicken with ease.
How To Avoid Damaging The Skin During Plucking
Plucking a chicken requires some finesse to avoid damaging the skin. Here are some tips to help you achieve a clean plucking process without compromising the chicken’s skin quality:
- Wet plucking method: Wetting the chicken with warm water or a gentle stream of running water before plucking can help loosen the feathers and make them easier to remove without much resistance. The wet feathers also tend to come off cleaner, reducing the chances of damaging the skin.
- Feather direction: Pluck the feathers in the natural direction they grow to minimize the risk of tearing or damaging the skin. This means plucking against the grain or in the opposite direction the feathers lie.
- Gentle pulling: Use a gentle and steady pulling motion to remove the feathers. Avoid pulling too forcefully or tugging at the skin, as this can lead to skin tears or damage.
- Tweezers for stubborn feathers: If there are some stubborn feathers that won’t come off easily, use a pair of tweezers to remove them individually. This allows for better precision and reduces the chances of damaging the skin.
- Cut rather than pull: If you encounter clumps of feathers that are difficult to remove without causing damage, consider using a pair of sharp poultry shears to carefully cut them away instead of trying to pull them out.
By following these tips, you can pluck a chicken with minimal damage to the skin, ensuring a more visually appealing end result.
Proper Handling And Disposal Of Chicken Waste
Handling and disposing of chicken waste is an essential part of the plucking and cleaning process. Here are some important practices to ensure proper waste management:
- Hygiene precautions: Before and after handling the chicken, it’s crucial to practice proper hygiene measures, such as washing your hands thoroughly with soap and water. This helps prevent the spread of any potential bacteria or contaminants.
- Separate designated area: Set up a designated area for handling and disposing of chicken waste. This can be a plastic bag or container specifically for chicken offal, feathers, and other waste materials.
- Double-bagging: To prevent any leakage or odor, consider double-bagging the waste. Place the chicken waste in one bag, tie it securely, and then place it in another bag before tying it again.
- Disposal methods: Check your local regulations for proper disposal methods of chicken waste. In some areas, it may be suitable for composting, while in others, it may need to be disposed of in dedicated waste bins or picked up by waste management services.
- Cleaning and sanitization: After the plucking and cleaning process, make sure to thoroughly clean and sanitize the area where the chicken was handled to eliminate any potential bacteria or cross-contamination.
By following these practices, you can effectively handle and dispose of chicken waste in a sanitary and responsible manner. This ensures a cleaner and safer plucking and cleaning process.
Remember, with the right techniques and attention to detail, you can pluck and clean a chicken efficiently without compromising skin quality and maintain high standards of hygiene during waste disposal. Happy plucking!
Techniques For Achieving A Perfectly Cleaned Chicken
Discover effective techniques for achieving a perfectly cleaned chicken in this comprehensive guide. Learn step-by-step instructions on how to pluck and clean a chicken, ensuring a delicious and hygienic meal for your family.
Removing excess fat and blemishes:
- Start by rinsing the chicken under cold water to remove any loose debris.
- Place the chicken on a clean cutting board and pat it dry with paper towels.
- Use a sharp knife or kitchen shears to trim away any excess fat from the chicken.
- Inspect the chicken for any blemishes, such as bruises or discoloration, and remove them carefully with the knife.
Inspecting for any remaining feathers or debris:
- Run your hand over the chicken’s skin to feel for any remaining feathers or pin feathers.
- Use tweezers or pliers to carefully remove any feathers that you find. Take your time to ensure you don’t leave any behind.
- Check the chicken’s cavities for any debris or organs that may have been missed during the initial cleaning process.
- Gently remove any remaining debris and rinse the cavities with cold water.
Mastering the art of plucking and cleaning a chicken requires attention to detail and following specific techniques. By removing excess fat and blemishes, as well as inspecting for any remaining feathers or debris, you can achieve a perfectly cleaned chicken ready for cooking.
So, put on your apron and get ready to impress with your culinary skills!
Specific Considerations For Different Chicken Breeds
Different chicken breeds require specific considerations when it comes to plucking and cleaning. Understanding the unique features and characteristics of each breed will help ensure a proper and efficient process.
Heritage or free-range chickens require some specific considerations when it comes to plucking and cleaning. These breeds tend to have more feathers and require a little more care during the process. Here are some tips to ensure you handle them properly:
- Begin by inspecting the chicken’s feathers closely to identify any blemishes or damage that may require extra attention during plucking.
- Gently pluck the feathers, paying close attention not to damage the skin or leave any small feather stubs.
- In some cases, it may be easier to use a dry plucking method for heritage or free-range chickens, as wet plucking can be more challenging due to the thicker feather coverage.
- Take extra care around delicate areas such as the wings and tail. These areas may have denser feathers, and you’ll want to avoid tears or bruising during the plucking process.
- After plucking, examine the skin for any remaining stubs or pin feathers. These can be removed using a pair of tweezers.
- To clean the chicken, use cool, running water to rinse away any dirt or debris that may have accumulated on the surface of the skin.
- Gently pat the chicken dry with a clean towel, avoiding any rough rubbing or excessive pressure that could cause damage.
- If necessary, you can also use a vinegar rinse to help remove any lingering odors or bacteria from the chicken’s skin.
- Once cleaned, you can proceed with any further preparation steps or recipes as desired.
Cleaning Game Birds And Other Poultry
Cleaning game birds and other poultry may require different methods and considerations compared to plucking and cleaning chicken breeds. Here are some key points to keep in mind:
- Start by removing the feathers, taking care not to damage the birds’ delicate skin in the process. Various methods can be used, including dry plucking or wet plucking depending on personal preference.
- After plucking, make sure to check for any remaining feathers or quills that may have been missed. Use tweezers to remove them if necessary.
- Pay attention to the overall cleanliness of the bird, checking for any dirt, blood, or other debris. Rinse the bird thoroughly with cool water to remove any contaminants.
- Some game birds and poultry may have a stronger gamey flavor or odor. You can minimize this by soaking the bird in a brine solution for a few hours before cooking. This will help improve the taste and tenderness.
- It’s essential to handle game birds and other poultry with care to avoid cross-contamination and the spread of bacteria. Use separate cutting boards and utensils for raw and cooked poultry, and always wash your hands thoroughly after handling.
- If you plan to freeze the cleaned birds, ensure they are completely dry before packaging them for freezer storage. This will help prevent freezer burn and maintain their quality.
Remember, plucking and cleaning poultry requires attention to detail and proper handling techniques, no matter the breed. By following these specific considerations, you can ensure a successful and delectable outcome for your poultry dishes.
Adapting The Process For Specific Recipes Or Cooking Methods
Adapting the plucking and cleaning process for specific chicken recipes or cooking methods is essential for achieving the desired results. Mastering this technique ensures a flavorful and well-prepared chicken dish.
Plucking and cleaning a chicken can be a straightforward process, but adapting it for specific recipes or cooking methods requires some additional steps. Whether you’re trussing a chicken for roasting or grilling, or prepping chicken for recipes that require skin-on or bone-in meat, each method has its own nuances to ensure the best results.
Let’s explore these techniques in more detail:
Trussing A Chicken For Roasting Or Grilling
Trussing a chicken helps it cook more evenly and maintain its shape. Here’s how to do it:
- Start by rinsing the chicken thoroughly and patting it dry.
- Tie the drumsticks together using butcher’s twine, crossing them over each other and making a secure knot.
- Tuck the wings behind the back of the chicken, holding them in place against the body.
- Trussing a chicken for roasting or grilling helps it retain moisture, resulting in juicy and succulent meat.
Prepping Chicken For Recipes That Require Skin-On Or Bone-In Meat:
Some recipes benefit from using chicken with the skin on or bone-in. Here’s how to prep the chicken:
- Begin by removing any excess feathers and hairs from the chicken’s skin with a pair of tweezers or by singeing them over a flame.
- If the recipe calls for skin-on chicken, leave the skin intact. If the recipe requires bone-in meat, avoid removing the bones.
- Season the chicken according to your recipe’s requirements, ensuring that the flavors penetrate the meat.
- Prepping chicken with the skin on or bone-in adds flavor and moisture to the final dish.
Adapting the plucking and cleaning process for specific recipes or cooking methods allows you to enhance the taste and texture of your chicken dishes. Whether you’re trussing a chicken for roasting or grilling to ensure even cooking, or prepping skin-on or bone-in chicken for added flavor and moisture, these extra steps can take your culinary creations to the next level.
Experiment with different techniques and recipes to find what works best for you. Happy cooking!
Conclusion
Mastering the art of plucking and cleaning a chicken is an essential skill for any home cook or aspiring chef. By following the step-by-step process outlined in this blog post, you can ensure that your chicken is properly prepared for cooking.
Remember to start with a properly stunned chicken and use the right tools for plucking, such as a plucker or fingers. Take your time and be methodical in removing the feathers, taking care not to damage the skin. Once the feathers are removed, proceed with the cleaning process to eliminate any remaining dirt or debris.
Washing, eviscerating, and rinsing the chicken thoroughly will ensure a safe and delicious end result. So next time you find yourself with a whole chicken, don’t be intimidated; with a little practice, you’ll be plucking and cleaning like a pro.
