Hatching chicken eggs follows a day-by-day process. This guide provides a detailed overview of each stage.
Hatching chicken eggs is a fascinating process that requires patience and careful attention. From the moment the eggs are incubated, a series of developments take place each day until the chicks emerge. This day-by-day guide will walk you through the entire hatching process, providing valuable insights and tips for each stage.
Whether you are a beginner or an experienced poultry enthusiast, understanding the daily changes and requirements of the developing embryos is crucial for a successful hatch. By following this guide, you will gain a comprehensive understanding of the hatching journey and be better equipped to provide the optimal conditions for the eggs to hatch into healthy and vibrant baby chicks.
Understanding The Incubation Process
Understanding the incubation process is crucial when it comes to successfully hatching chicken eggs. With the right knowledge and preparation, you can effectively nurture the eggs and witness the miracle of life unfold right before your eyes. In this section, we will explore the various factors to consider before incubating chicken eggs, the importance of choosing the right breed, and how to prepare the incubator and gather the necessary supplies.
Factors To Consider Before Incubating Chicken Eggs
Before embarking on the journey of hatching chicken eggs, it’s important to take certain factors into consideration. Let’s dive into these factors:
- Acknowledge the Commitment: Hatching chicken eggs requires time, effort, and consistent monitoring. Prepare yourself for the responsibility that comes with incubation and be prepared to dedicate the necessary time and effort.
- Source of Fertile Eggs: Obtaining fertile eggs from a reliable source is crucial to ensure successful hatching. Look for healthy and disease-free parent chickens that have been bred according to breed standards.
- Egg Storage: Proper storage of eggs before incubation is essential. Store the eggs in a clean and temperature-controlled environment, maintaining a consistent temperature of around 50-65°F (10-18°C) with a humidity level of approximately 75-80%.
- Timing: Understanding the optimal timing for incubation is vital. Generally, eggs should be incubated within 7 days of being laid for better chances of hatching.
Choosing The Right Breed For Hatching Chicken Eggs
When it comes to hatching chicken eggs, selecting the appropriate breed is crucial for a successful outcome. Consider the following factors when choosing the breed:
- Climate Suitability: Different chicken breeds thrive in different climates. Determine the climate conditions in your area and select a breed that can withstand those conditions with ease.
- Egg Production: If you’re interested in a breed that not only hatches well but also produces abundant eggs, consider breeds like Rhode Island Reds or Leghorns, known for their high egg-laying capacity.
- Broodiness: Some chicken breeds exhibit natural broodiness, which can be beneficial for hatching eggs. Breeds like Silkies and Orpingtons are known for their broody tendencies, making them ideal choices for natural incubation.
- Personal Preference: Consider your personal preferences when selecting a breed. Whether it’s a specific feather color or a unique temperament, choose a breed that resonates with your preferences and goals as a chicken owner.
Preparing The Incubator And Gathering Necessary Supplies
Properly preparing the incubator and gathering the necessary supplies is crucial to create a suitable environment for egg incubation. Follow these steps:
- Clean and Disinfect: Ensure that the incubator and all supplies are thoroughly cleaned and disinfected before use. This helps prevent the growth of bacteria and ensures a healthy environment for the eggs.
- Temperature and Humidity: Set up the incubator according to the manufacturer’s instructions, ensuring that the temperature and humidity levels are properly calibrated. Aim for a temperature of around 99-100°F (37-38°C) and humidity levels between 45-55% during incubation.
- Egg Placement: Carefully place the eggs in the incubator, ensuring they are positioned with the pointed end facing downwards. This helps facilitate proper development and prevents potential issues with hatching.
- Egg Turning: Eggs need to be turned regularly during the incubation process to prevent the yolk from sticking to the shell and promote even development. Set up an automatic egg turner or manually turn the eggs multiple times a day, ensuring they are evenly rotated.
- Monitoring and Maintenance: Regularly monitor the incubator’s temperature, humidity levels, and any potential issues. Make adjustments as needed to maintain a stable and optimal incubation environment.
By understanding the incubation process, considering important factors, and properly preparing the incubator, you are well on your way to successfully hatching chicken eggs. Follow this day-by-day guide to maximize your chances of witnessing adorable chicks hatch and embark on a rewarding experience as a chicken owner.
Day 1: Setting Up The Incubator And Collecting Eggs
Setting up the incubator and collecting fresh eggs is an exciting first step toward hatching your own chicks. Properly preparing the incubator and ensuring the eggs are in optimal conditions are crucial for a successful hatch. In this guide, we will walk you through the essential tasks to complete on Day 1 to start your egg incubation journey.
Setting The Temperature And Humidity In The Incubator
When it comes to setting up the incubator, maintaining the right temperature and humidity levels is essential for the development of the embryos. It is recommended to keep the temperature around 99.5°F (37.5°C) throughout the incubation period. You can adjust the temperature using the thermostat or controls provided by your specific incubator model.
Humidity is another important factor that affects the eggs’ development. For the initial few days, maintaining a humidity level between 45% to 55% RH (relative humidity) is recommended. To achieve this, place a water pan or sponge filled with warm water inside the incubator. Monitor the humidity with a hygrometer and adjust as needed by adding or removing water from the pan.
Preparing The Eggs For Incubation
Before placing the eggs in the incubator, it is crucial to ensure their quality and viability. Start by collecting eggs from healthy hens that are at peak laying condition. Carefully examine each egg for cracks or any signs of damage. Discard any damaged eggs, as they are unlikely to hatch successfully.
For optimal results, store the collected eggs in a cool room with a temperature of around 50-65°F (10-18°C) while waiting to accumulate a sufficient number for incubation. It is important to rotate the eggs daily to prevent the yolk from sticking to the shell and decrease the risk of early embryonic deaths.
Placing The Eggs In The Incubator And Ensuring Proper Positioning
Once you have collected enough eggs and prepared the incubator, it’s time to carefully position the eggs for incubation. Place the eggs in an incubator tray or carton with the pointed end facing downwards. This helps in proper positioning of the embryo and improves the chances of a successful hatch.
Tip: To keep track of the incubation progress, mark each egg with a number or date using a pencil, as this will be useful when monitoring the development stages later on.
Make sure to provide sufficient space between the eggs to allow proper airflow within the incubator and promote even heat distribution. Avoid overcrowding the eggs, as this may hinder their development and increase the risk of malpositioned chicks.
Close the incubator lid securely, ensuring a tight seal to prevent heat and humidity loss. Now, your eggs are ready to embark on their journey towards hatching.
Day 7: Candling And Egg Inspection
Welcome to day 7 of your hatching journey! Today, we will be focusing on candling and egg inspection. This crucial step will allow you to check the fertility and development of your chicken eggs. By candling, you can gain valuable insights into the progress of your eggs and identify any potential issues that may affect their viability.
Candling Eggs To Check For Fertility And Development
One of the primary reasons for candling eggs is to determine their fertility and development. Candling typically involves shining a bright light source through the eggshell to examine its contents. This process allows you to observe the presence of veins and signs of growth within the egg.
To perform candling, follow these simple steps:
- Select a dark room or dimly lit area to ensure optimal visibility.
- Hold the egg gently and position it in front of the light source.
- Shield the light with your hand to prevent direct light from hurting your eyes.
- Observe the egg closely and look for any signs of movement, such as rocking or wiggling.
- Check for the presence of well-defined veins, which indicate successful fertilization.
- Identify the air cell, located at the wider end of the egg, to assess its development.
Remember, candling should be done quickly and minimally to prevent excessive handling of the eggs. This will minimize the risk of damage or contamination.
Identifying Common Issues And Determining Egg Viability
Candling provides an opportunity to identify common issues that may affect the viability of your eggs. By closely examining the egg during this process, you can spot potential problems such as:
- Cracked or damaged shells
- Unfertilized or infertile eggs
- Abnormal growth or development
- Early mortality or embryo death
Identifying these issues helps you determine which eggs are likely to hatch successfully and which may not. It also enables you to make necessary adjustments to improve the overall hatch rate.
Adjusting Temperature And Humidity As Necessary
Through candling and egg inspection, you may encounter eggs that require specific adjustments to temperature and humidity. Some eggs may exhibit slower development or other anomalies, indicating a need for environmental corrections.
If you notice developmental delays or irregularities, consider adjusting the temperature and humidity parameters within your incubator. Consult the manufacturer’s guidelines or professional advice to determine the appropriate changes for your specific situation.
Remember, maintaining optimal temperature and humidity levels is crucial for successful hatching. Making necessary adjustments based on candling observations can greatly improve your chances of a successful hatch.
Day 14: Turning The Eggs And Monitoring Development
On day 14 of the hatching process, it’s crucial to focus on turning the eggs and closely monitoring the development of the embryos. Understanding the importance of egg turning, developing a turning schedule and technique, and monitoring the progress of embryo development are key factors in ensuring a successful hatch. Let’s dive into each of these aspects in detail.
Understanding The Importance Of Egg Turning
Egg turning is a crucial step in the incubation process as it helps to prevent the embryo from sticking to the shell and ensures proper development. By turning the eggs regularly, you allow the embryo to receive an equal amount of heat and oxygen from all sides, promoting healthy growth. This process also helps to strengthen the chick’s muscles and skeletal system, as it mimics the natural movements of the hen.
Developing A Turning Schedule And Technique
To ensure consistent and effective egg turning, it is important to develop a schedule and technique that works best for your setup. Determine how often you will rotate the eggs and at what angles you will turn them. It’s recommended to turn the eggs at least three times a day, with intervals of around 4 to 8 hours. A turning angle of approximately 45 degrees is sufficient to ensure proper oxygen flow and prevent any stress on the developing embryo.
Creating a turning schedule and adhering to it diligently is crucial for maintaining optimal conditions within the incubator. It’s essential to note down the time of each turn to track the developmental progress accurately. On day 14, pay extra attention to the rotation process, as the embryos are becoming more sensitive to their surroundings.
Monitoring The Progress Of Embryo Development
On day 14, it’s time to carefully monitor and assess the progress of the embryos. This can be done through a process known as candling, where a bright light source is used to illuminate the inside of the egg. It allows you to observe the development of blood vessels, the formation of the chick’s body, and any signs of potential issues.
During this stage, it’s important to make note of any abnormal developments, such as blood rings or early mortality, which may indicate that the embryo is not viable. Removing any non-viable eggs will help maintain a healthy environment for the remaining ones. Additionally, ensure that the temperature and humidity levels within the incubator are consistent and within the recommended range for the specific breed of chickens you are hatching.
By diligently turning the eggs, following a proper schedule and technique, and closely monitoring the embryo development, you are taking essential steps towards a successful hatch. Remember, each day brings new changes and developments, so staying attentive and proactive is key to ensuring the best outcome for your hatching chicken eggs.
Day 21: Hatching And Caring For Chicks
On day 21 of hatching chicken eggs, the long-awaited moment finally arrives as tiny cracks appear on the shells. This is an exciting time for any backyard chicken keeper, as it marks the beginning of new life. In this article, we will guide you through the process of recognizing signs of hatching and assisting if necessary, creating a brooder and providing a suitable environment, and nurturing and feeding the newly hatched chicks.
H3recognizing Signs Of Hatching And Assisting If Necessary/h3
When it comes to hatching chicken eggs, it’s important to keep a close eye on the eggs throughout the incubation period. On day 21, you may notice subtle movements and chirping sounds coming from inside the eggs. These are signs that the chicks are starting to make their way out.
If you happen to notice an egg that isn’t hatching on its own, there are a few steps you can take to offer assistance. Before intervening, it’s essential to make sure that the chick is truly in distress. Look for signs of exhaustion, such as a lack of movement for an extended period or an inability to make progress with the hatching process.
If you determine that intervention is necessary, you can carefully chip away a small piece of the eggshell to provide the chick with an opening to breathe. Be extremely gentle during this process to avoid injuring the chick.
H3creating A Brooder And Providing A Suitable Environment/h3
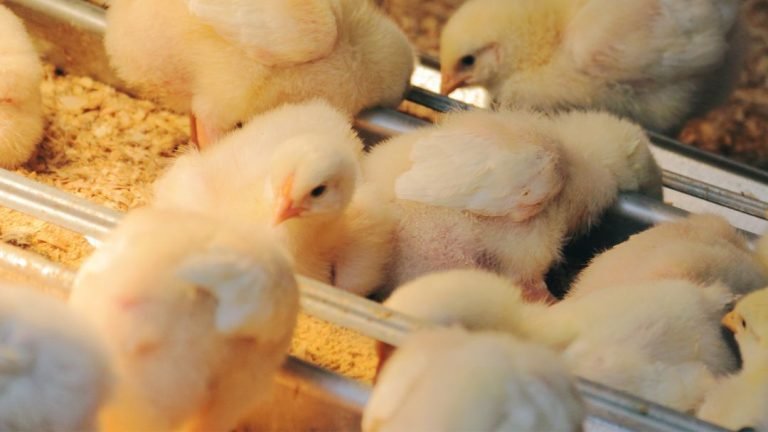
Once the chicks have successfully hatched, it’s crucial to transfer them to a brooder. A brooder is a warm and safe environment where the chicks can grow and thrive during their early days. To create a brooder, you will need a large box or pen lined with clean and absorbent bedding material such as wood shavings or straw.
The brooder should be equipped with a heat source to maintain the optimal temperature for the chicks. A heat lamp or a brooder plate can be used to provide warmth, and the temperature should be set at around 95°F (35°C) for the first week. Monitor the temperature closely and make adjustments as needed to ensure the chicks stay comfortable and healthy.
H3nurturing And Feeding The Newly Hatched Chicks/h3
Once the chicks are settled in the brooder, it’s time to start nurturing and feeding them. Water is essential for their survival, so make sure to provide a shallow dish of clean water at all times. Add marbles or rocks to the dish to prevent the chicks from drowning.
For their nutrition, offer a high-quality chick starter feed specially formulated for young poultry. Ensure access to feed at all times and monitor their intake to ensure they are eating enough. Additionally, consider providing a source of fresh greens, such as chopped lettuce or sprouts, to introduce a varied diet and promote healthy growth and development.
In conclusion, day 21 marks an exciting turning point in the process of hatching chicken eggs. By recognizing signs of hatching and being prepared to assist if necessary, creating a suitable brooder environment, and providing proper nutrition, you can ensure the health and well-being of your newly hatched chicks as they embark on their journey of growth and development.
Conclusion
To conclude, hatching chicken eggs is an exciting and rewarding process that requires careful monitoring and attention to detail. By following this day-by-day guide, you can ensure the optimal conditions for success. Remember to maintain the right temperature, humidity, and turning frequency throughout the incubation period.
Patience is key, as hatching can take anywhere from 21 to 28 days. With proper care and dedication, you’ll soon be welcoming adorable chicks into the world. Happy hatching!


